sudo docker cp myfile.txt ccae4670f030:/usr/shareDocumento mi viaje en desarrollo de software, inteligencia artificial y soluciones tecnológicas que transforman ideas en realidad.
python -m pip install oracledb
Then add this to your top level SQLAlchemy 1.4 file:
import sys
import oracledb
oracledb.version = "8.3.0"
sys.modules["cx_Oracle"] = oracledb
docker build -t ubuntu-test:latest . does work.
docker build -t ubuntu-test:latest ./Dockerfile does not work.
Paso 1: Listamos nuestros contenedores
1 | sudo docker ps |
Los contenedores podrían estar o no en ejecución.
Luego de haber hecho todos los cambios a nuestro contenedor, vamos a crear una imagen.
Paso2: Creado imagen.
1 | sudo docker commit ff357b1f0c66 ubuntuchange |
commit: Comando para crear imagen de docker
ff357b1f0c66: En el ID del contenedor de la cual vamos a crear una imagen
ubuntuchange: Nombre que le damos a la imagen de docker
Paso3: Listamos las imagenes de docker.
Como podemos ver ya tenemos nuestra imagen creada con ID: 074db4b9721f
ARM es una arquitectura RISC. RISC significa Cómputo de conjunto de instrucciones reducido. Esto significa que la CPU tiene un número limitado de instrucciones que puede usar. Como resultado, cada instrucción se ejecuta en un solo ciclo y las instrucciones son más simples. Mientras tanto, x86 es una arquitectura CISC, que significa Computación de conjunto de instrucciones complejas. ARM está diseñado para ser más pequeño, más eficiente energéticamente y genera menos calor. Un problema es que los programas x86 no pueden ejecutarse en ARM. La mayoría de los lenguajes de programación pueden apuntar a ARM muy bien. Cualquier programa mantenido actualmente debería tener pocos problemas. Sin embargo, todo lo que se escriba en Ensamblaje deberá reescribirse para que funcione en ARM. También hay un problema de velocidad. Dado que ARM tiene menos instrucciones, los desarrolladores deben usar más instrucciones.
Para la versión CentOS 8 y Ubuntu 20.04 de la arquitectura x86_64, puede encontrar esta publicación sobre cómo instalar Docker/Docker-Compose:
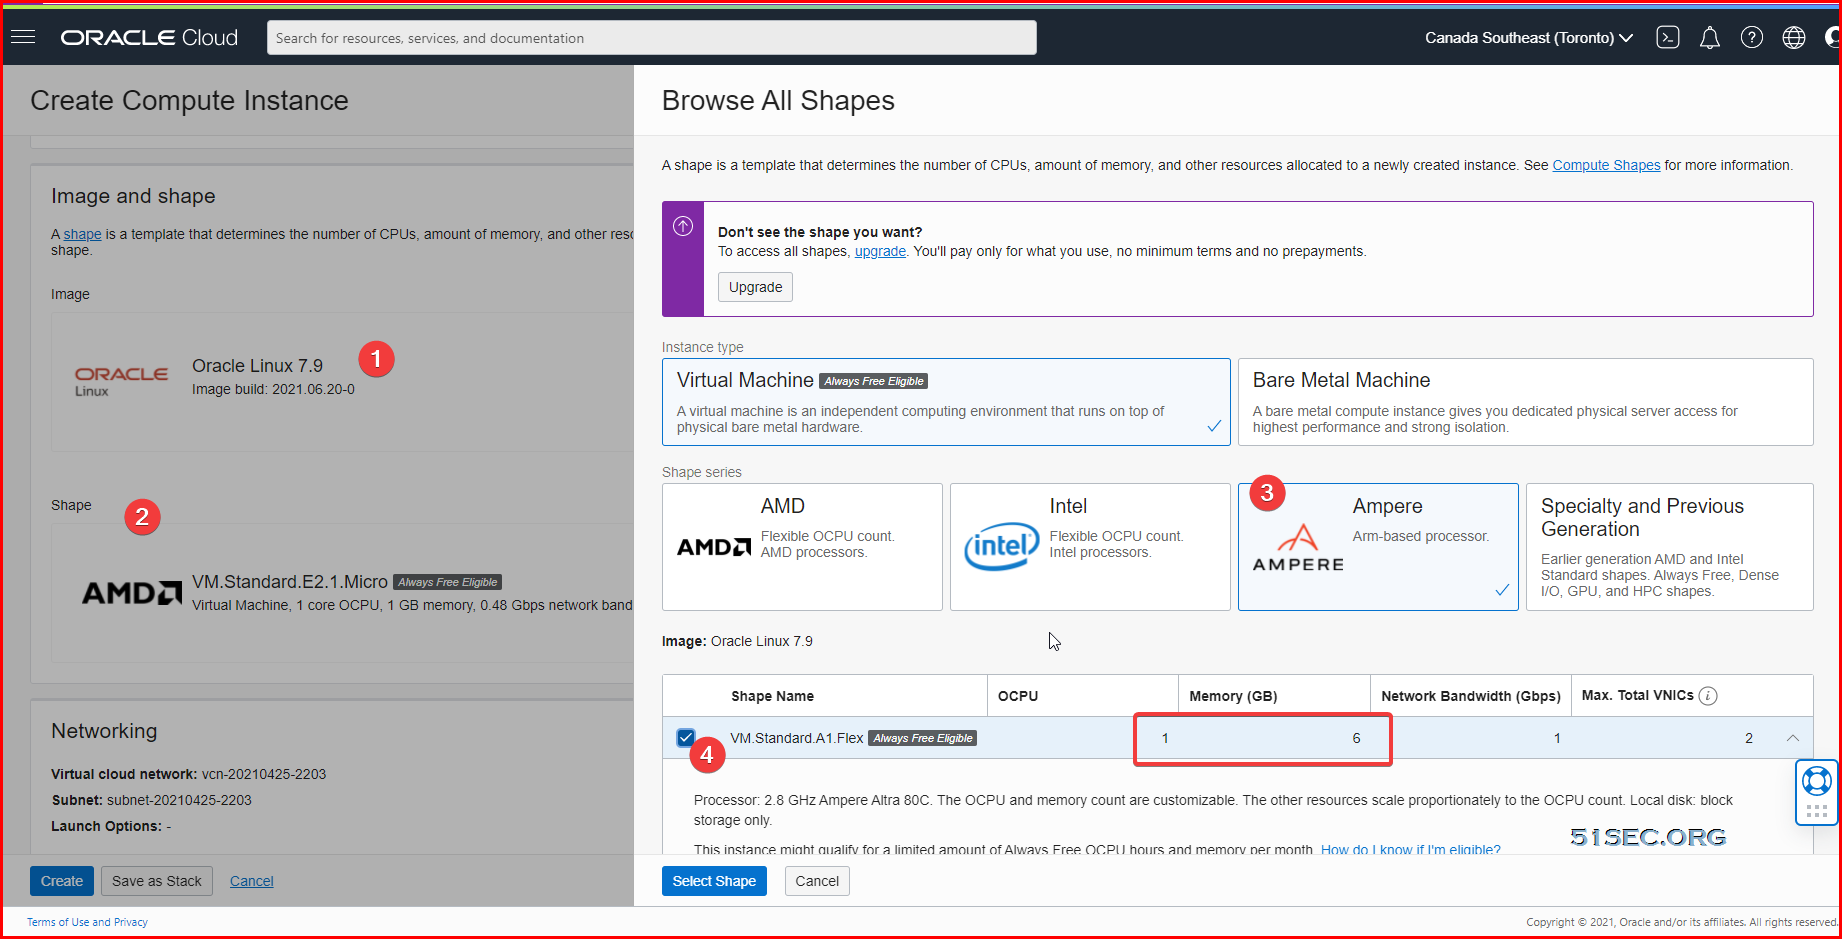
Choose Oracle Image. Default username is opc
You also can use Ubuntu 20.04 (not minimum) version to use Arm based shape. The installation for docker and docker compose will be a little different, which you can find out from this post (Install Docker, Docker-Compose, Portainer & Nginx on CentOS 8 & Ubuntu 20.04)
Check System Public IP:
[root@arm1 ~]# curl https://ip.51sec.org/api
132.145.100.226
[root@arm1 ~]# yum upgrade -y && yum update -y
[root@arm1 ~]# apt update -y && apt upgrade -y
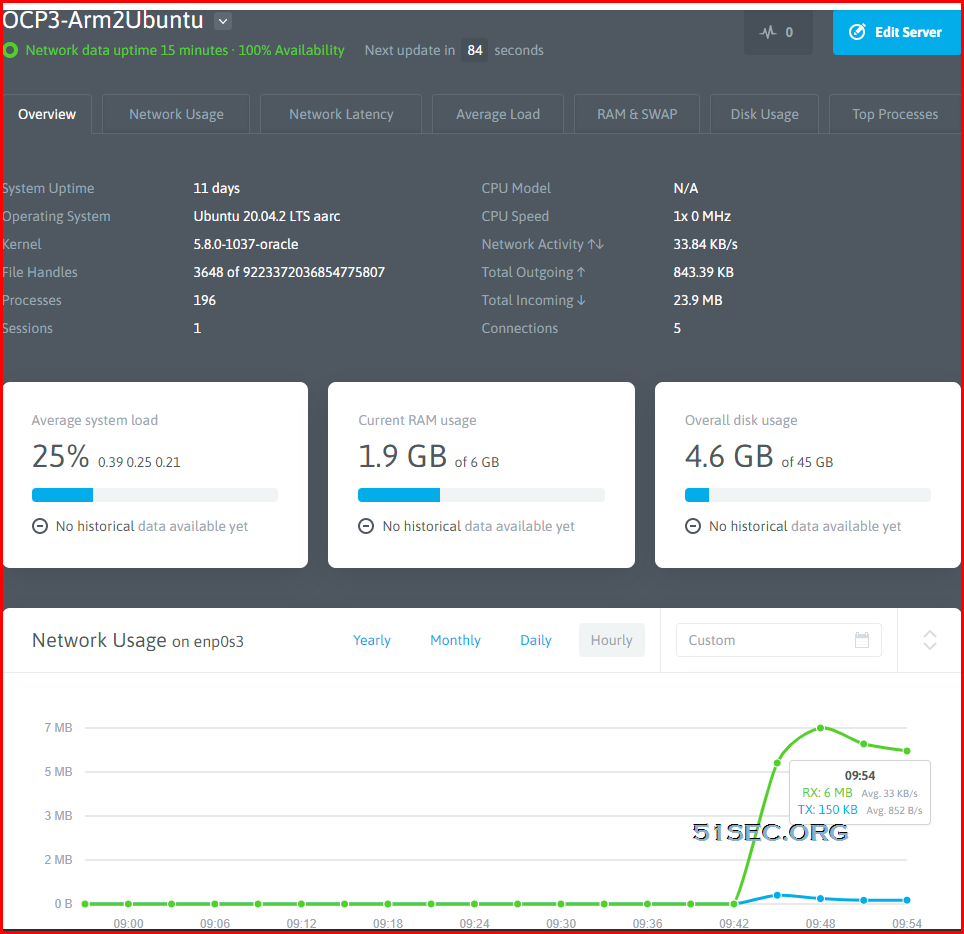
Nodequery stopped the service since Sep 2021. Check other services in my post:
Free Cloud Server Monitoring Services: Netdata, New Relic, Datadog, Instrumental
You will get a one line sensor installation code from NodeQuery add a new server page.
root@opc3arm2ubuntu:~# wget -N --no-check-certificate https://raw.github.com/nodequery/nq-agent/master/nq-install.sh && bash nq-install.sh gRa6yhaYPTkpogsqZRMFy0CMgfmj05
--2021-08-02 13:43:44--  https://raw.github.com/nodequery/nq-agent/master/nq-install.sh
Resolving raw.github.com (raw.github.com)... 185.199.108.133, 185.199.109.133, 185.199.110.133, ...
Connecting to raw.github.com (raw.github.com)|185.199.108.133|:443... connected.
HTTP request sent, awaiting response... 301 Moved Permanently
Location: https://raw.githubusercontent.com/nodequery/nq-agent/master/nq-install.sh [following]
--2021-08-02 13:43:44--  https://raw.githubusercontent.com/nodequery/nq-agent/master/nq-install.sh
Resolving raw.githubusercontent.com (raw.githubusercontent.com)... 185.199.109.133, 185.199.110.133, 185.199.111.133, ...
Connecting to raw.githubusercontent.com (raw.githubusercontent.com)|185.199.109.133|:443... connected.
HTTP request sent, awaiting response... 200 OK
Length: 4781 (4.7K) [text/plain]
Saving to: ‘nq-install.sh’

nq-install.sh                                            100%[===============================================================================================================================>]   4.67K  --.-KB/s    in 0s

Last-modified header missing -- time-stamps turned off.
2021-08-02 13:43:44 (71.0 MB/s) - ‘nq-install.sh’ saved [4781/4781]

|
|   NodeQuery Installer
|   ===================
|
|   Downloading nq-agent.sh to /etc/nodequery
|
|   + 2021-08-02 13:43:45 URL:https://raw.githubusercontent.com/nodequery/nq-agent/master/nq-agent.sh [8537/8537] -> "/etc/nodequery/nq-agent.sh" [1]
|
|   Success: The NodeQuery agent has been installed
dnf install -y dnf-utils zip unzip
dnf config-manager --add-repo=https://download.docker.com/linux/centos/docker-ce.repo

dnf remove -y runc
dnf install -y docker-ce --nobest

systemctl enable docker.service
systemctl start docker.service

systemctl status docker.service
docker info
docker version
apt install docker.io -y && apt install docker-compose
yum install -y libffi libffi-devel openssl-devel python3 python3-pip python3-devel
pip3 install docker-compose
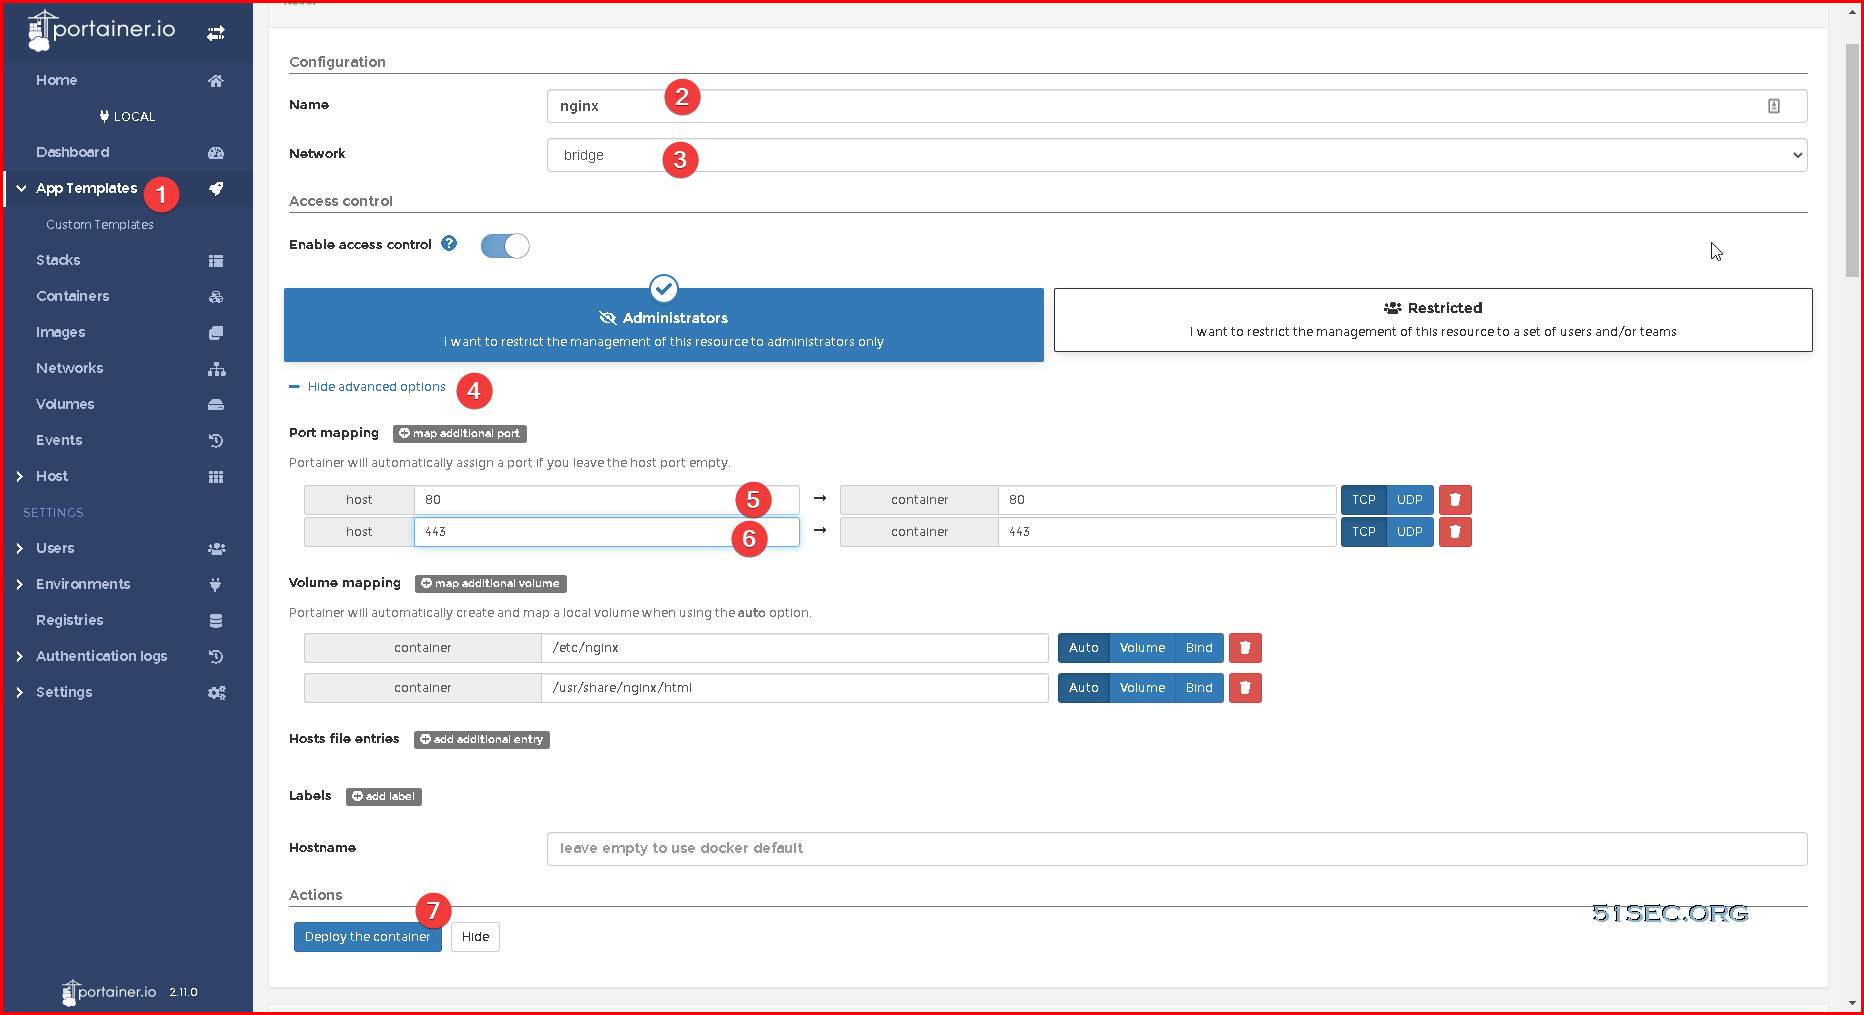
ln -s /usr/local/bin/docker-compose /usr/bin/docker-composeCommands to install Portainer:
[root@arm1 ~]# docker volume create portainer_data
portainer_data
[root@arm1 ~]# docker run -d -p 9000:9000 --name portainer --restart always -v /var/run/docker.sock:/var/run/docker.sock -v portainer_data:/data portainer/portainer-ce:latest
root@4ccb3643b7e4:/etc/nginx/conf.d# cat portainer.conf
server {
listen 80;
server_name opc2armportainer2.51sec.eu.org;
location / {
proxy_pass http://portainer:9000;
proxy_http_version 1.1;
proxy_read_timeout 300;
proxy_set_header Upgrade $http_upgrade;
proxy_set_header Connection "upgrade";
proxy_set_header Host $http_host;
proxy_set_header X-Real-IP $remote_addr;
proxy_set_header X-Real-PORT $remote_port;
}
}
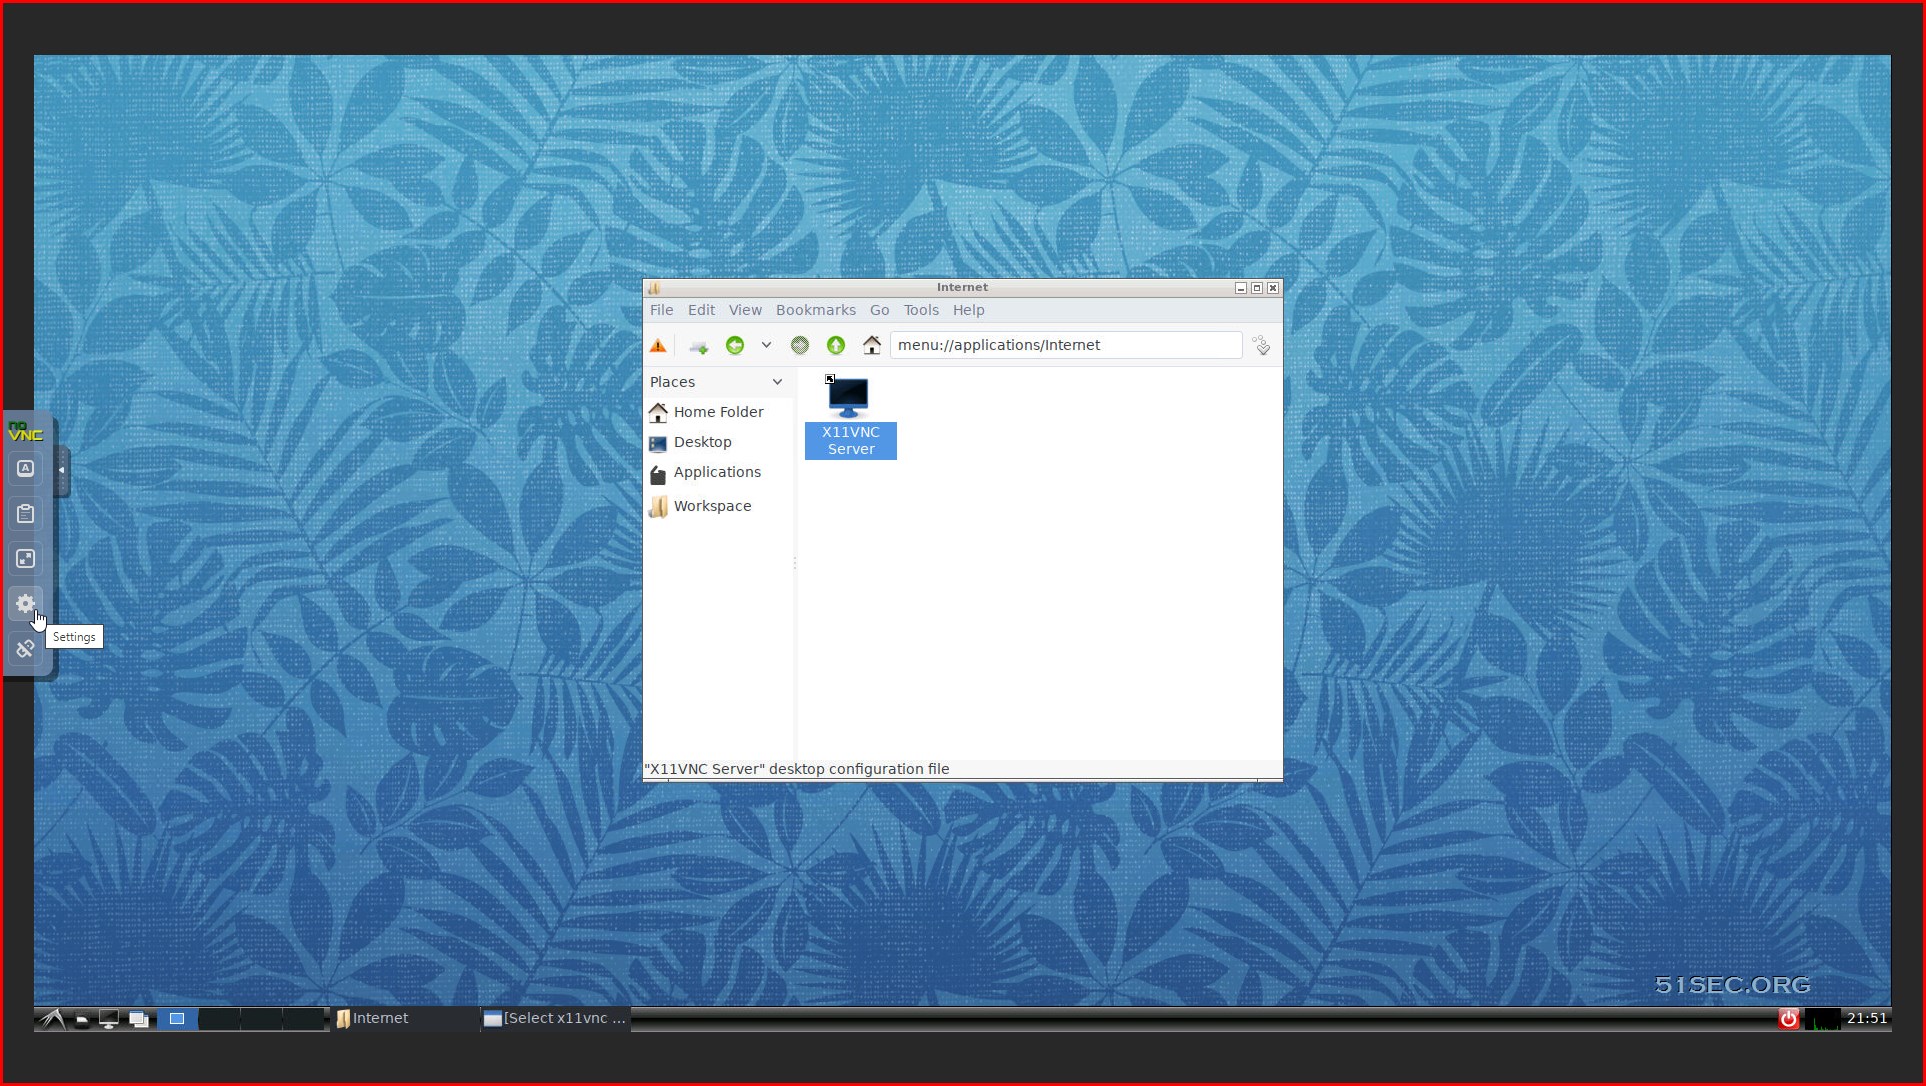
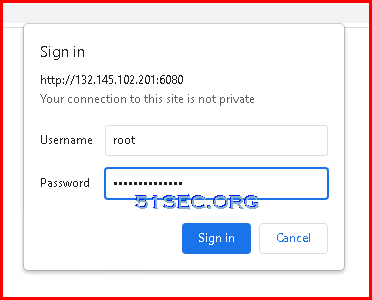
root@4ccb3643b7e4:/etc/nginx/conf.d# docker run -p 6080:80 fredblgr/ubuntu-novnc:20.04
The docker support basic http password authentication:
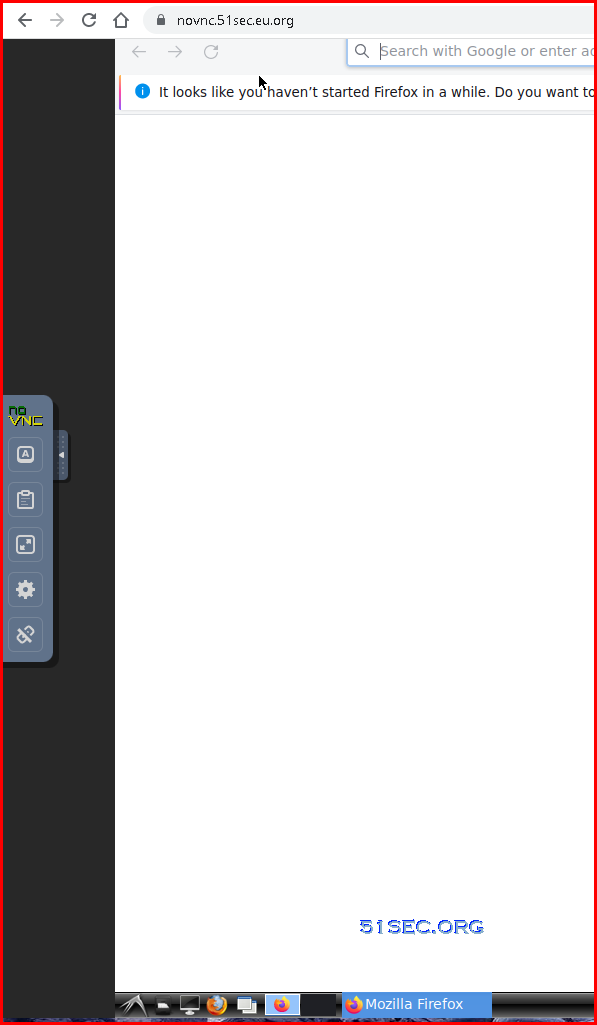
docker run -d -p 6080:80 -v $PWD:/workspace:rw -e HTTP_PASSWORD=P@ssword1234 -e RESOLUTION=1680x1050 --name ubuntu-novnc fredblgr/ubuntu-novnc:20.04From Ubuntu terminal, you can install firefox to have a browser for your internet.
User name is root, and password is what we set using "docker run" command.
To install Firefox, here is a command after logged in noVNC.
apt update -y && apt install firefox -y
root@4ccb3643b7e4:/# cd /etc/nginx/
root@4ccb3643b7e4:/etc/nginx# cd conf.d/
root@4ccb3643b7e4:/etc/nginx/conf.d# cat novnc.conf
server {
    listen       80;
    server_name  novnc.51sec.eu.org;

location / {
    proxy_pass       http://14.23.12.11:6080;
    proxy_http_version         1.1;
    proxy_read_timeout 300;
    proxy_set_header Upgrade $http_upgrade;
    proxy_set_header Connection "upgrade";
    proxy_set_header Host $http_host;
    proxy_set_header X-Real-IP $remote_addr;
    proxy_set_header X-Real-PORT $remote_port;
           }
}
root@4ccb3643b7e4:/etc/nginx/conf.d#
After this, https://novnc.51sec.eu.org/ works well.
Notes:
1) At present, the entire Oracle region should have arm. Except for popular areas, such as India and Sydney, arm machines are still very good. In addition, Japan and South Korea are in hell mode.
2) When terminating the server, be sure to pay attention to whether the boot volume is also terminated together!
3) The opened server currently does not have the [Always Free] logo, but there is a boot volume!
4) For a new account (without the trial period), the ARM server will be stopped after the trial period expires, and your arm will be released after about 60 days. You need to re-open the arm to release it, and your machine will be stable after activation.
5) As for dd, it is not recommended, the title is very risky, but there may also be metaphysical factors in it.
6) Bill query, if you are worried about the non-free content you have opened, you can check it if you have incurred a fee!
https://cloud.oracle.com/usage/reports
7) Free resources are 3,000 OCPU hours + 18,000GB memory usage per month. Regardless of charging and trial users, there are so many free resources. Converted to 4+24, it is about 750 hours, and it should be no problem to play for a month.
8) The previous ordinary machine is still limited to 2 permanent free machines, this has not changed.
9) Your permanent free resources are still network traffic of 10TB per month, total disk quota space of 200G , a total of 4 IPV4 addresses (*3 temporary + 1 reserved), and the IPV6 address is the number of /16. That is to say, you can open 6 machines, and finally two use pure IPV6.
10) Regarding the size of the boot volume, because the default is 45G, if you think it is too small, you can modify the size online, but the premise is that your 200G has not been used up by you. How to modify it, click on the block storage boot volume,

Duplicate Docker and Re-deploy it.
This image provides base access authentication of HTTP via HTTP_PASSWORD
docker run -p 6080:80 -e HTTP_PASSWORD=mypassword -v /dev/shm:/dev/shm dorowu/ubuntu-desktop-lxde-vncdocker run -p 6080:80 -e HTTP_PASSWORD=P@ssword1234 -v /dev/shm:/dev/shm dorowu/ubuntu-desktop-lxde-vnc:focal-arm64
Further detail about docker "dorowu/ubuntu-desktop-lxde-vnc" can be found from this URL
It is also possible to enable sound support in this docker image but I tested it and it does not work well with ARM based machine
docker container ls
para ver los contenedores existentes y sus ids. Entonces corre
docker exec -it $containerid$ bash
Para mostrar una consola bash. (Los primeros caracteres de la identificación del contenedor jupyterhub son suficientes para identificarlo)
Para crear un nuevo usuario de Linux:
useradd $username$
passwd $username$
Luego se le pedirá la contraseña.
Además, ejecute el siguiente comando dentro del contenedor:
pip install notebook
De lo contrario, el servidor de desove no funciona, consulte también:
https://stackoverflow.com/questions/56441563/jupyterhub-spawn-error-first-installation
Luego, puede iniciar sesión con las credenciales de inicio de sesión recién creadas.
it is work on both platform (android & ios)
class MyHttpOverrides extends HttpOverrides{
  @override
  HttpClient createHttpClient(SecurityContext context){
    return super.createHttpClient(context)
      ..badCertificateCallback = (X509Certificate cert, String host, int port)=> true;
  }
}

void main(){
    HttpOverrides.global = new MyHttpOverrides();
    runApp(new MyApp());
}

Senior Developer & AI Specialist
Medellín, Colombia 🇨🇴
